If you are having wifi problem with your m8 android box, then follow these solutions,
1. Shutdown and restart Android TV box WIFI connection
When using the m8 android box to access the internet, the android box will retain the network IP address given to it by the WiFi connection, which will be applied to the active WiFi.
Do not worry if there is no address conflict. You must stop and start the WiFi connection if there is a conflict. The process is as follows:
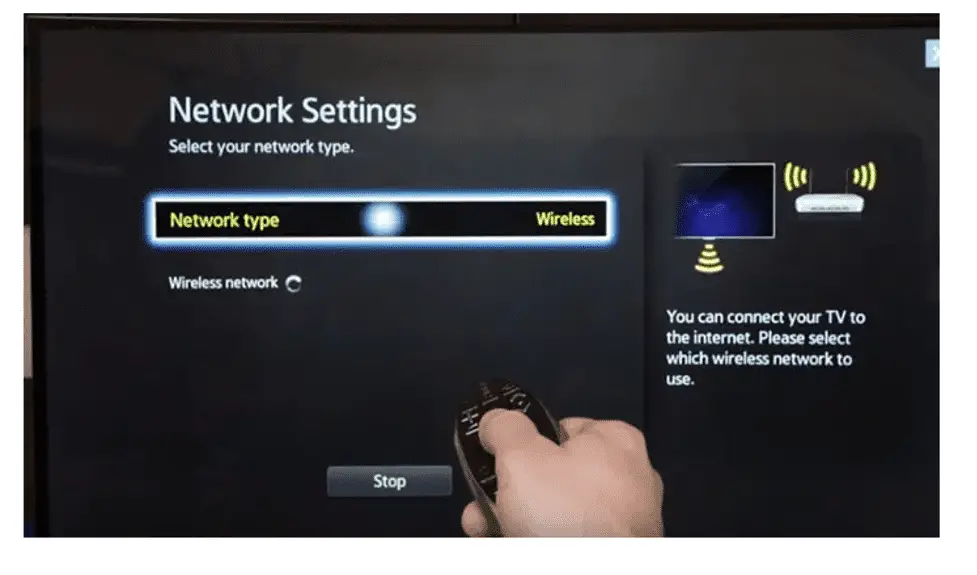
- Enter the “settings” bar on the TV box
- choose “wireless and network settings,”
- Enter the “WiFi settings” project.
- choose “turn off WiFi” in the new window,
- Exit the operation, and then reopen the project to choose “turn on WiFi” to reestablish the WiFi connection.
2. Forget the Android TV box network
If the method mentioned above is unsuccessful, you can instruct your m8 Android box to forget the network and add it again. The following is the procedure:
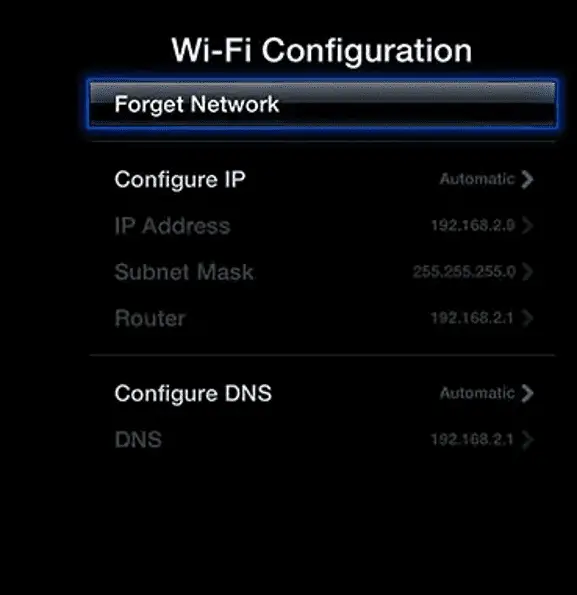
Choose to “forget the network” by moving to the coverage area that needs to be ignored. Then, when you return, wait for the network to automatically appear in the coverage area.
To sign in again, type the network password. By doing this,Android TV boxes are then able to acquire new addresses and function properly.
3. Check the WiFi password for the Android TV box
WiFi passwords should generally be changed on a regular basis. However, the TV box won’t automatically be updated when the network makes such changes, and the WiFi password will need to be set manually. This is how it’s done:
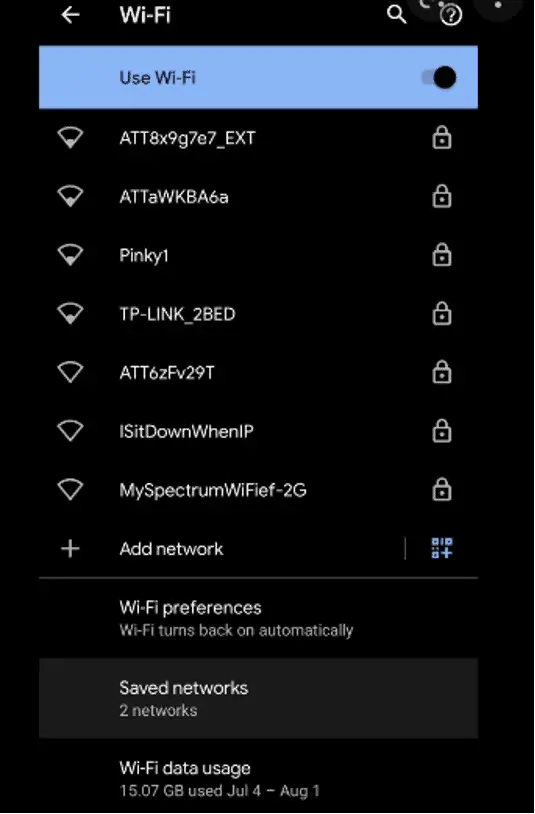
- Exit the network’s coverage area where the issue is occurring;
- Enter the WiFi configuration project where changes need to be made;
- Select “modify network settings;”
- Enter the new password in the window and check the information you entered for the password;
- Lastly select “save password”.
The WiFi will function regularly in this manner.
4. Check out WiFi’s advanced settings.
If none of the previous solutions work, the next step is to enter the Android TV box’s advanced WiFi settings and make the necessary adjustments. This is how it’s done:
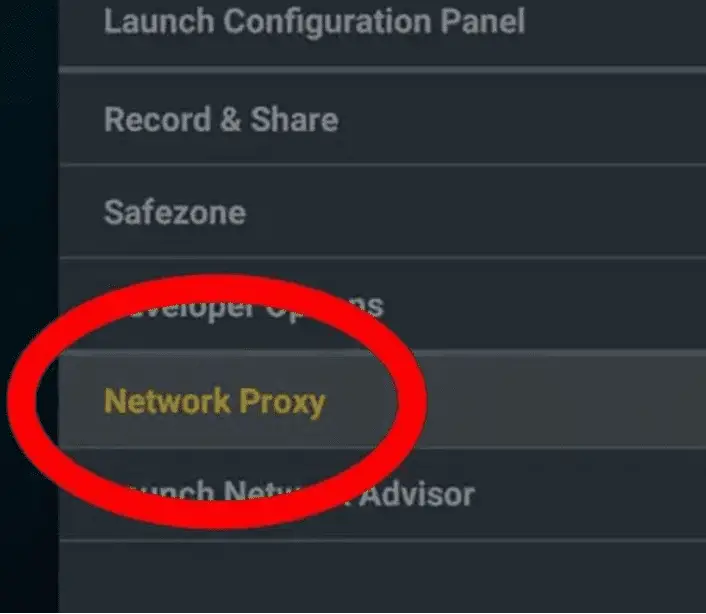
- Open the TV box’s menu.
- Go to the “settings” window.
- Select “wireless and network,”
- Enter “WiFi settings,” select “advanced,”
- Enter “proxy server settings,” and validate that Android devices are not connected to a proxy server.
- Remove it to fix the WiFi connection issue if the IP address or domain name is included in the proxy section.
5. Configure static IP addresses
Setting static IP addresses for Android TV boxes is another option.
This suggests that either the device was assigned the incorrect address or that there may be DHCP address assignment issues with the router the user needs to connect to.
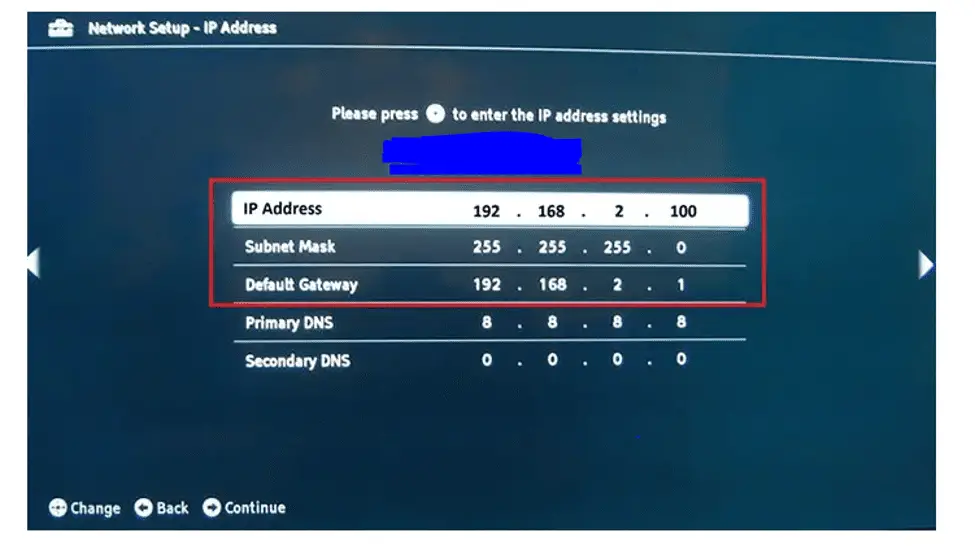
Enter the information into the static IP address setting bar to set the static IP address (IP address, gateway, subnet mask, DNS, etc.).
A static IP address may only be used when the user is connected to one WiFi, which is the sole drawback because it will apply to all WiFi.
6. Disable WiFi hibernation techniques
Users should try setting the WiFi inactivity options to “never” and see if the problem disappears if WiFi is a common issue.
The power consumption will rise if the strategy is set to “never,” but in other ways it will also improve the stability of WiFi connections.
7. Turn off VPN
Your Android device may be unable to connect to the internet because of your VPN. It may be necessary to disable your VPN if you use it with your TV box. You’ll learn how to do that by following the given instructions.
- Click “Settings.”
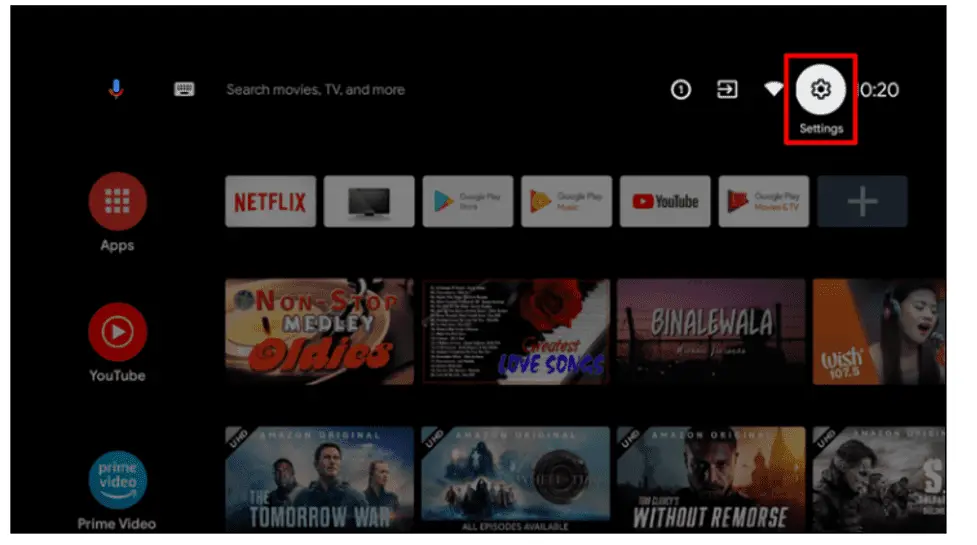
- Navigate to “Network & Internet.”
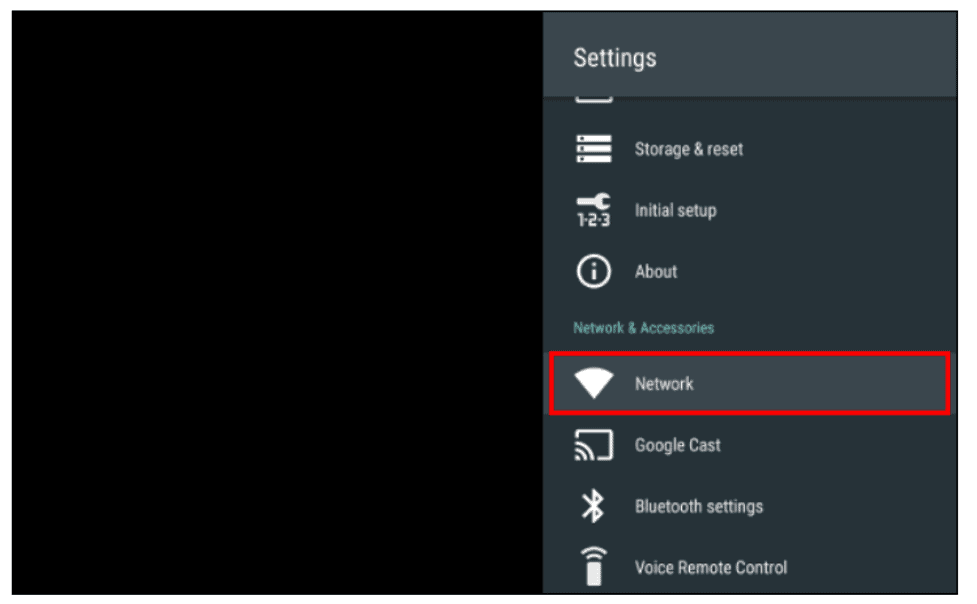
- Select the VPN you wish to disable by tapping “VPN” on the menu that appears.
- “Disconnect” button should be clicked.
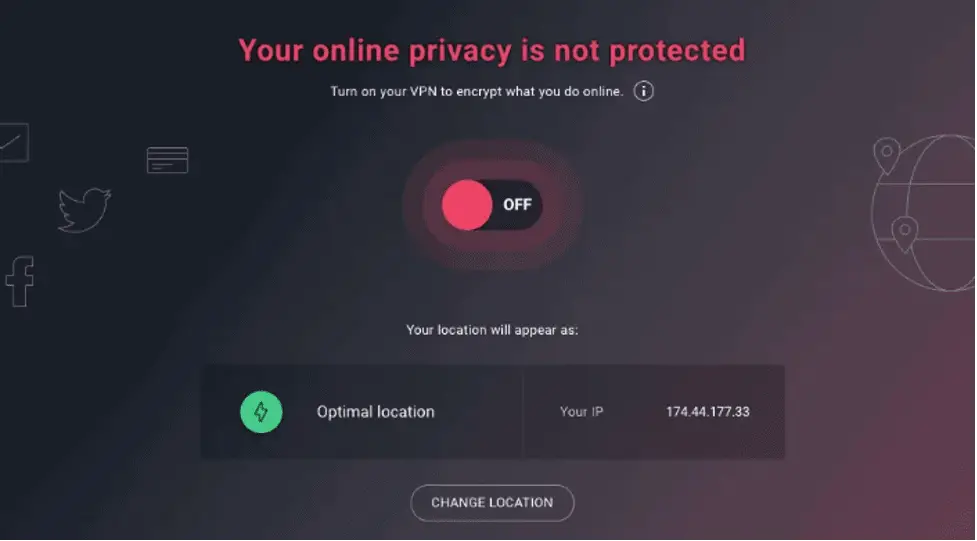
- As a result of the delinking of your VPN, your Android TV should now function normally.
8. Limit for Data Saving Has Been Reached
If your data saver limit has been reached, you might be having connectivity problems. You might need to turn off the feature on your device if it is enabled. See the instructions for doing that below.
- Go to “Settings” on Android TV.
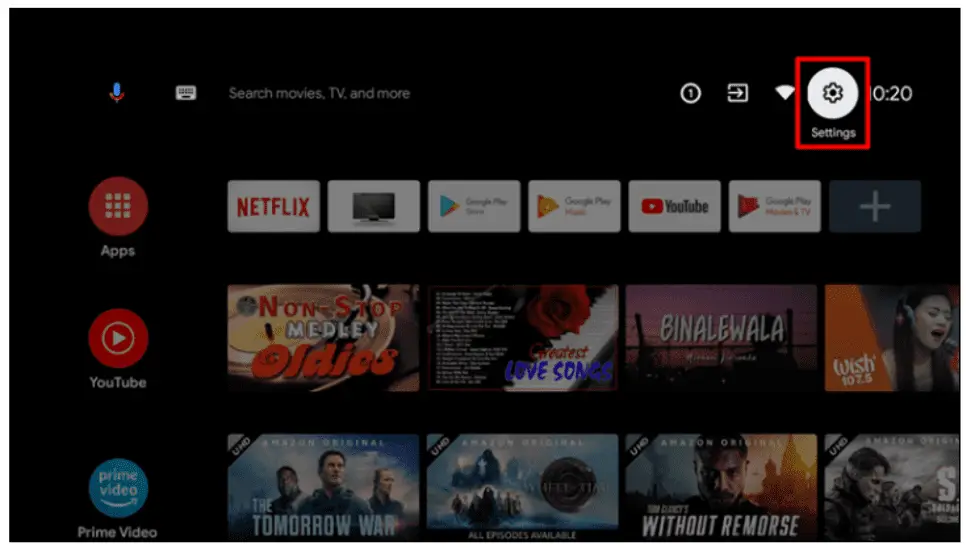
- Select “Network and Internet” then “Data Saver” from the menu.
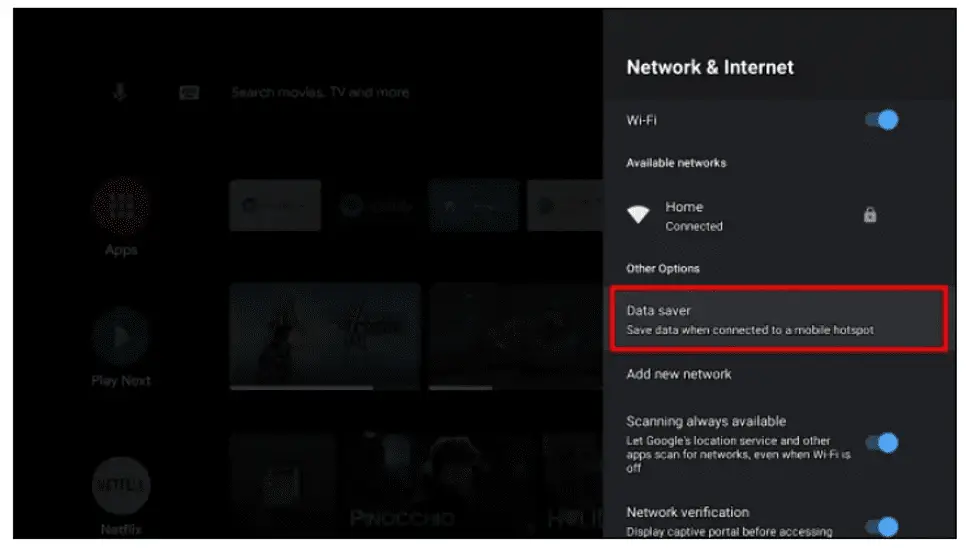
- Press the “Off” button once.
Additional Ways to Fix Wifi Problems
There Are Too Many Connected Devices
A connected device will still use some of the available bandwidth even if it isn’t actively delivering or receiving data.
Disconnecting useless devices from your WiFi is the first and simplest solution. It’s simplest to just change your WiFi password, which will start everyone off.
Then, you can restrict which devices can reconnect. If it isn’t possible, you can try changing bands (perhaps connecting to the 5 GHz frequency rather than the 2.4 GHz band, where it might be less congested).
The location of the router is problematic.
Install the router as close to or in the room where you want to use WiFi the most. Place the router as close to the center of the house as you can while elevating it so that nothing gets in the way.
As WiFi signals tend to bounce off of reflective surfaces like glass, mirrors, and metal, you should also avoid them.
A new router is required.
It’s probably time for new technologies in those situations. Newer services are becoming less and less compatible with older routers. After a reset, you could find that it functions… temporarily.
You will eventually need to purchase a newer router, though. Verify that you are using an updated version if you are renting from your WiFi provider. It’s probably time to bite the bullet and get a new one if you currently own one.
Confirm Whether Your Internet Provider Is Down
The most obvious explanation is that your internet provider is having issues if none of your devices can connect to the internet yet your WiFi indicator is still on.
It’s always a good idea to verify this first before rebooting and rearranging cables. To check if an outage is posted in your location.
Related Articles:
How to connect an android box to hotel wifi:(Simple Step)

